Answered: How are rolling ball sculptures mounted?

So you’d love to have your own rolling ball sculpture, but you’re wondering, “How do you display those things? Do they screw to the wall? Will it hurt my table?” Great questions, and I have answers!

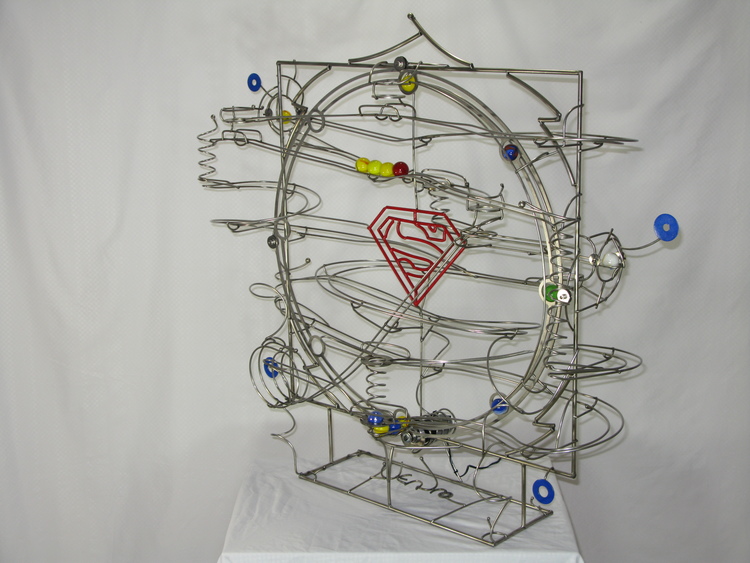
There are two common mounting situations for sculptures, wall mounts or free standing. A free standing sculpture rests on a horizontal surface. Free standing sculptures may be desired for several reasons. Sometimes there is no wall space available. In other situations, the sculpture might need to be moved on occasion. Additionally, the sculpture may be placed in a display case where all sides can be viewed. My sculpture “Tomfoolery” was created as a free standing piece to be placed in an existing display case at the Indianapolis Public Library, Central Branch. In that instance a free standing piece was ideal for them, because it could fit into an existing display case, eliminating the need for either purchasing or building another means of display.

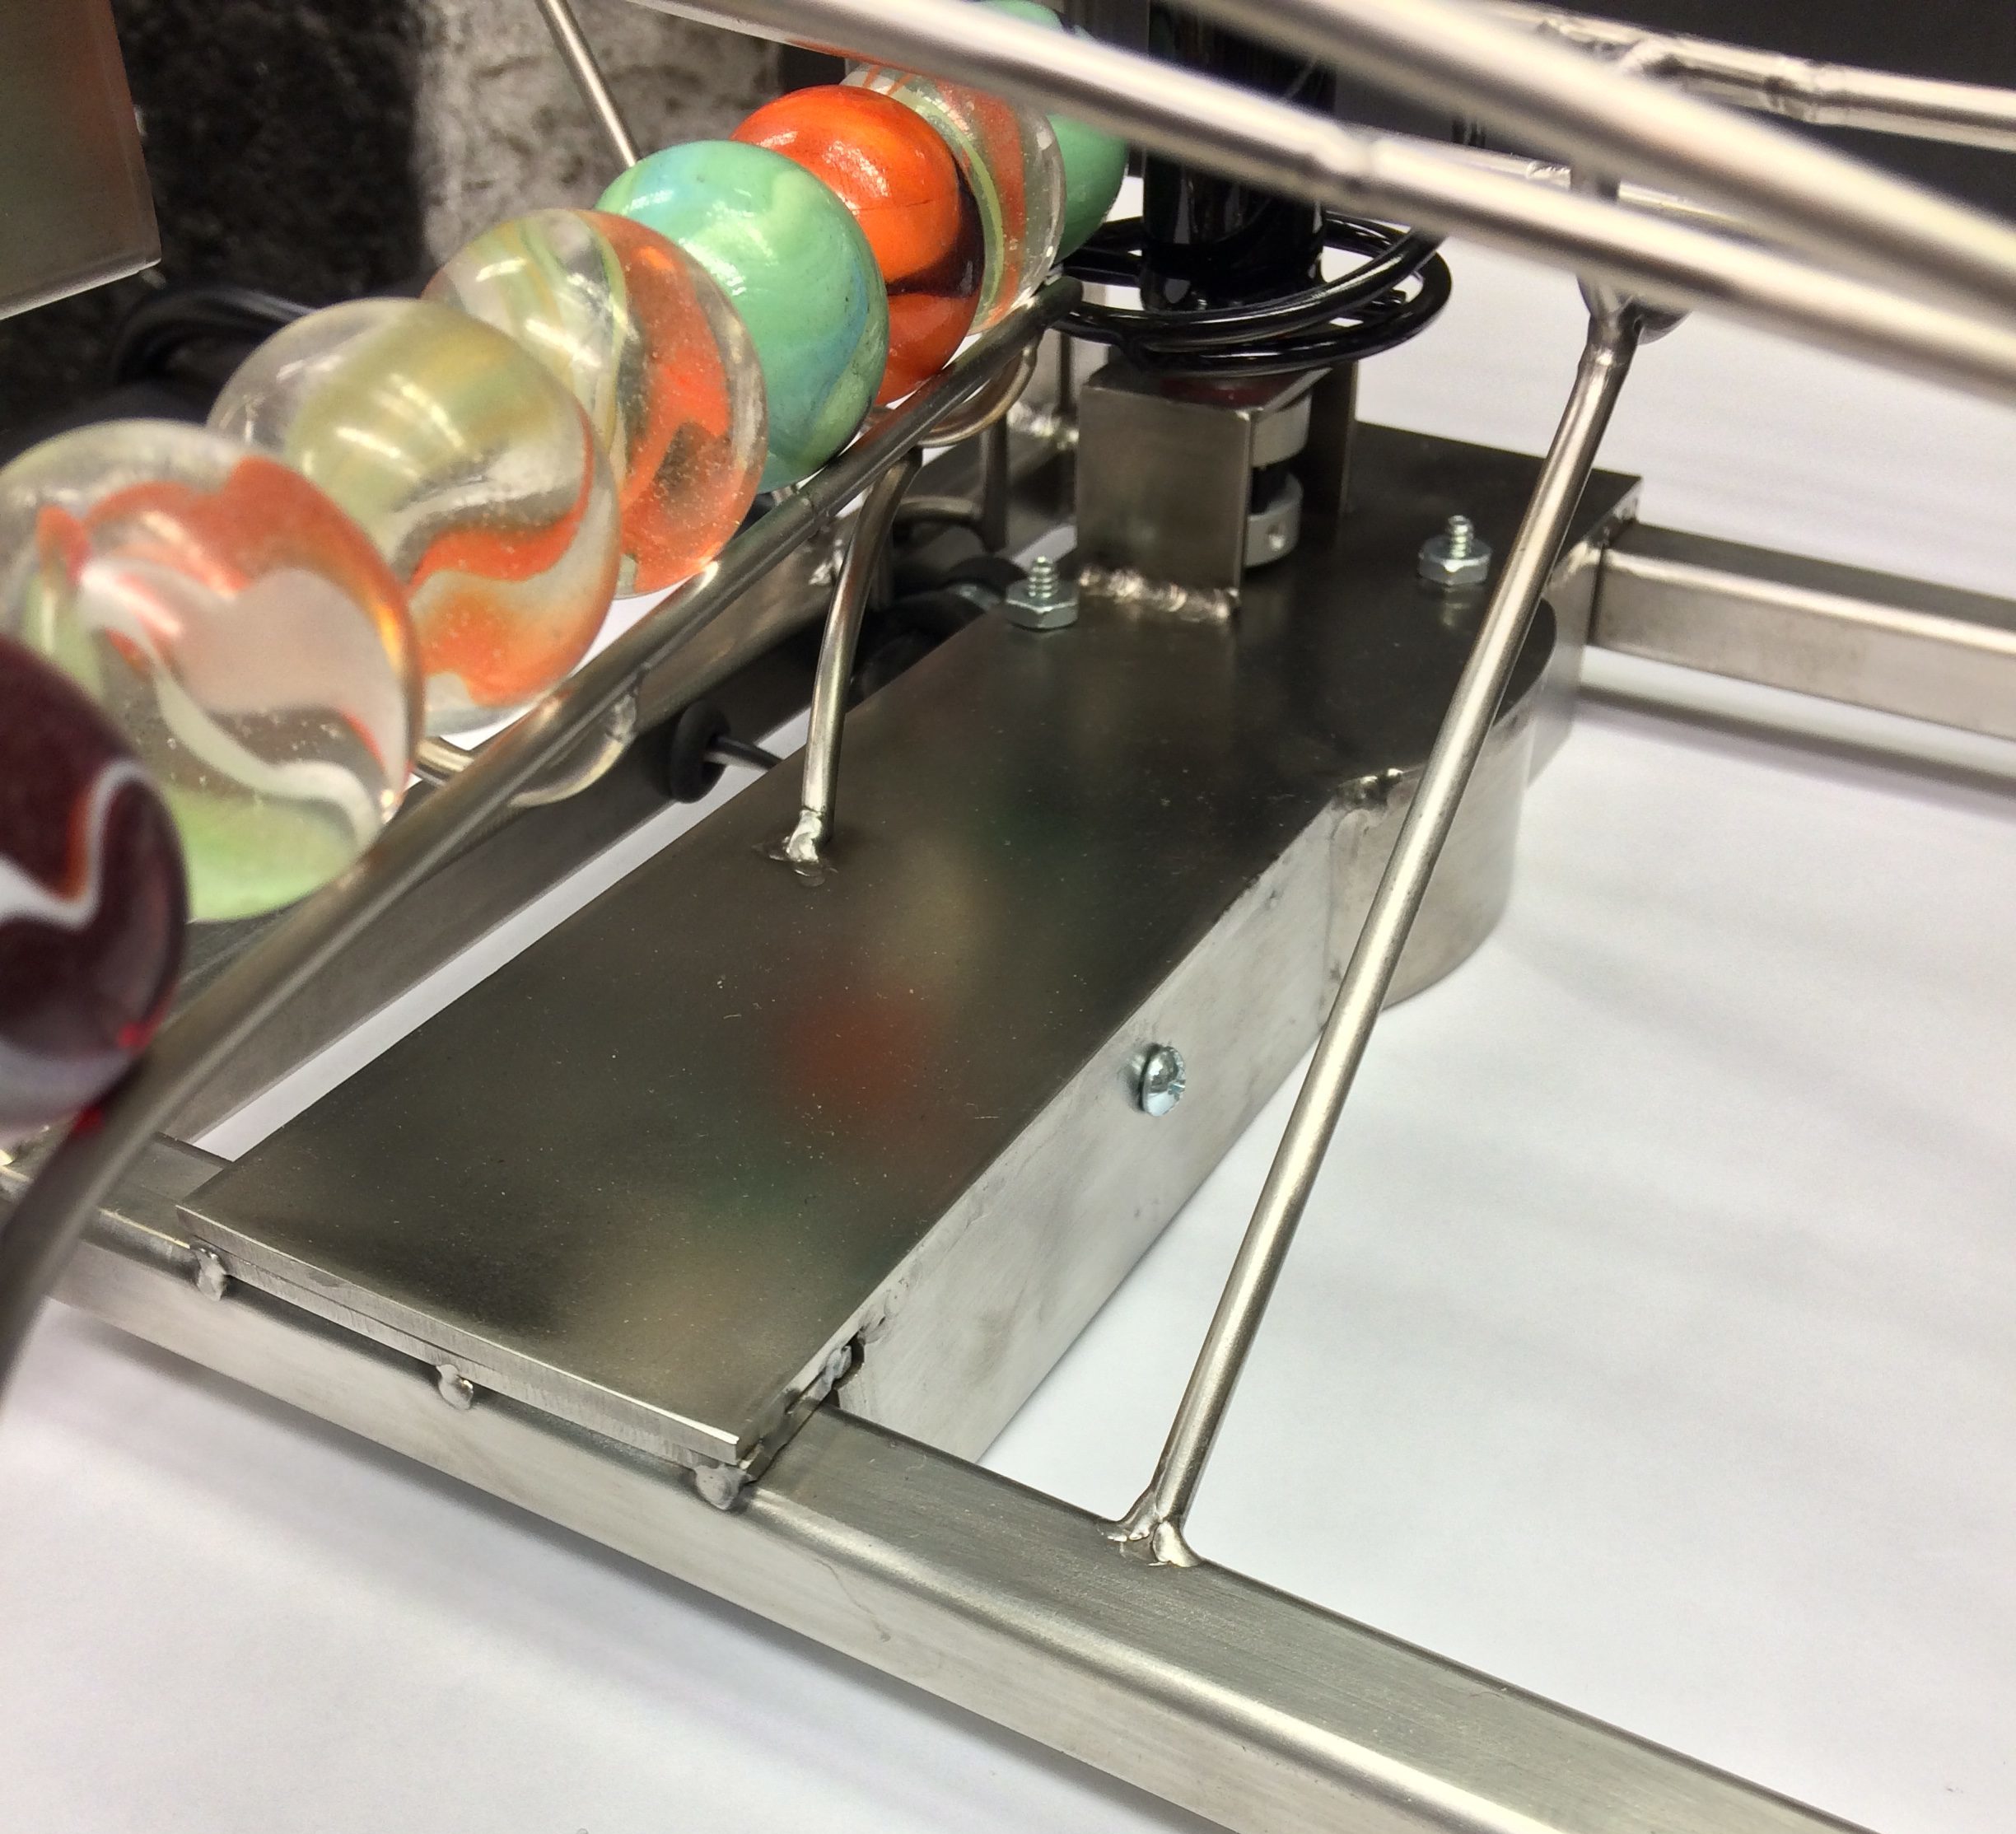
For free standing rolling ball sculpture, protective feet are installed on the frame. Typically the feet are made with of stainless steel with a protective pad at their base. The stainless upper portion matches the rest of the sculpture and features a screw mount that makes it adjustable in case of an uneven display surface. The bottom of the foot has a scratch-safe pad, most often of plastic to protect the surface on which it rests. Different types of feet can be used if you desire.

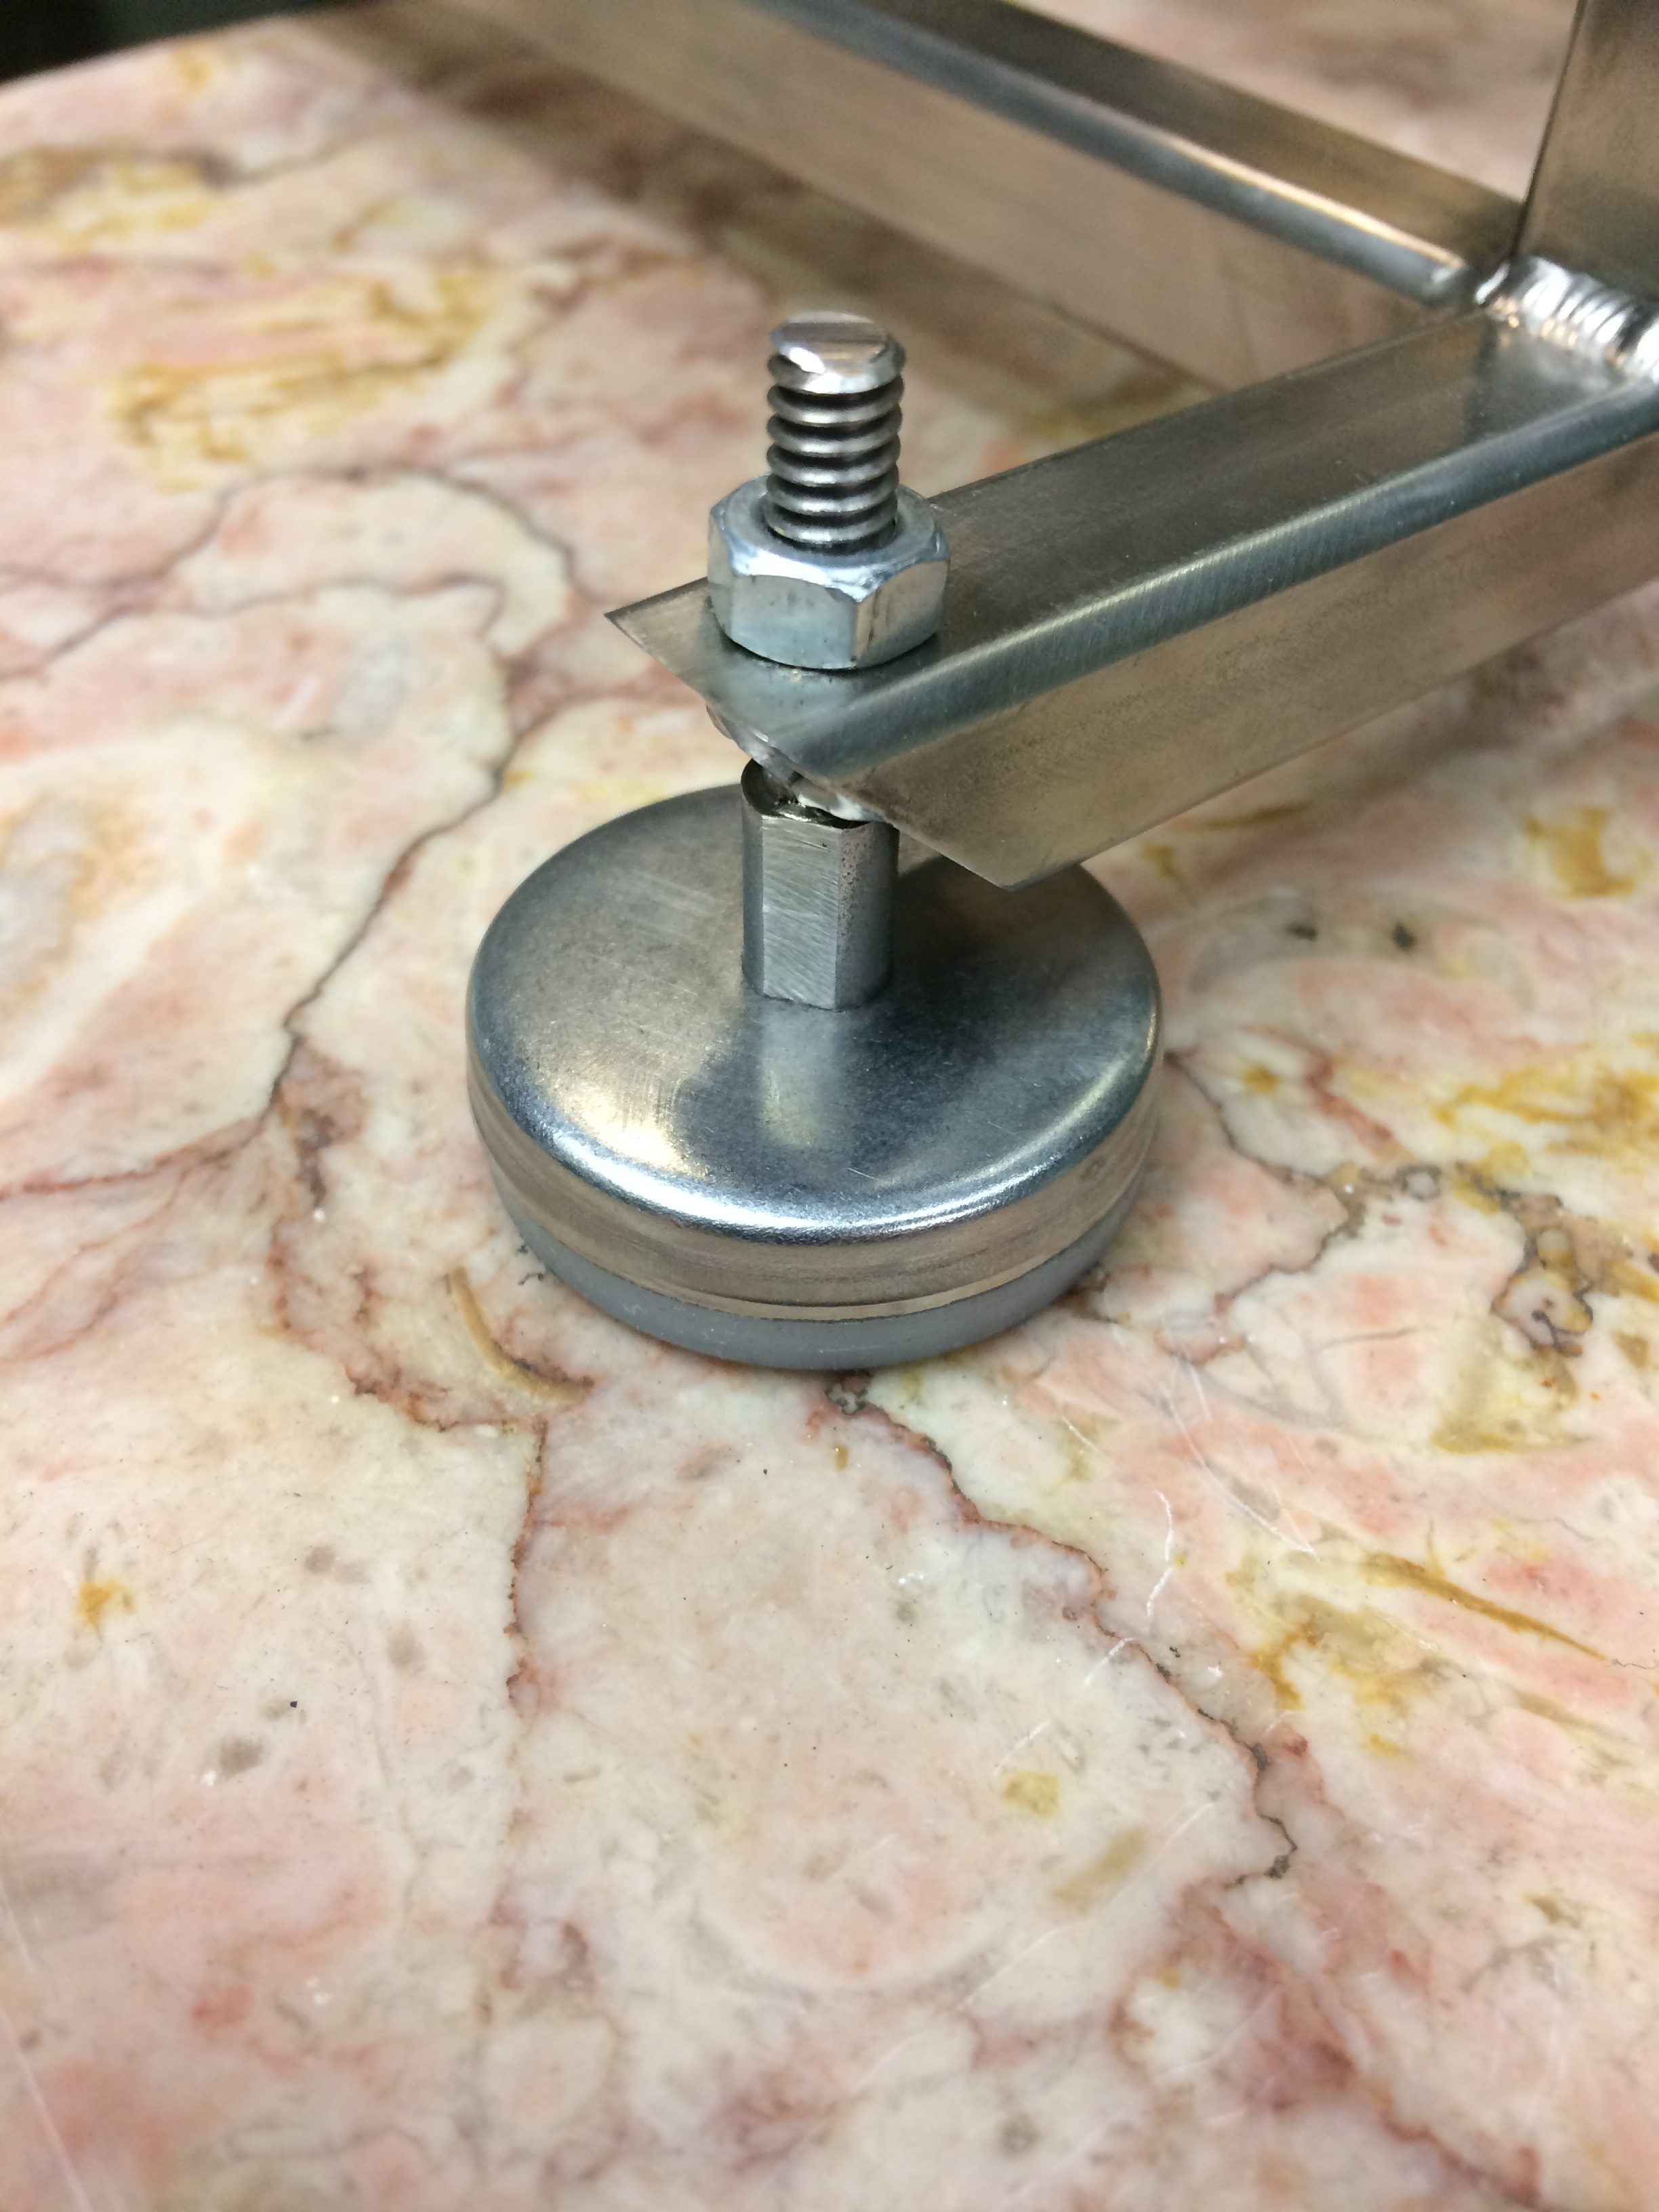
The surface mount of a free standing rolling ball sculpture is a stainless steel foot padded on the bottom to protect the surface finish.

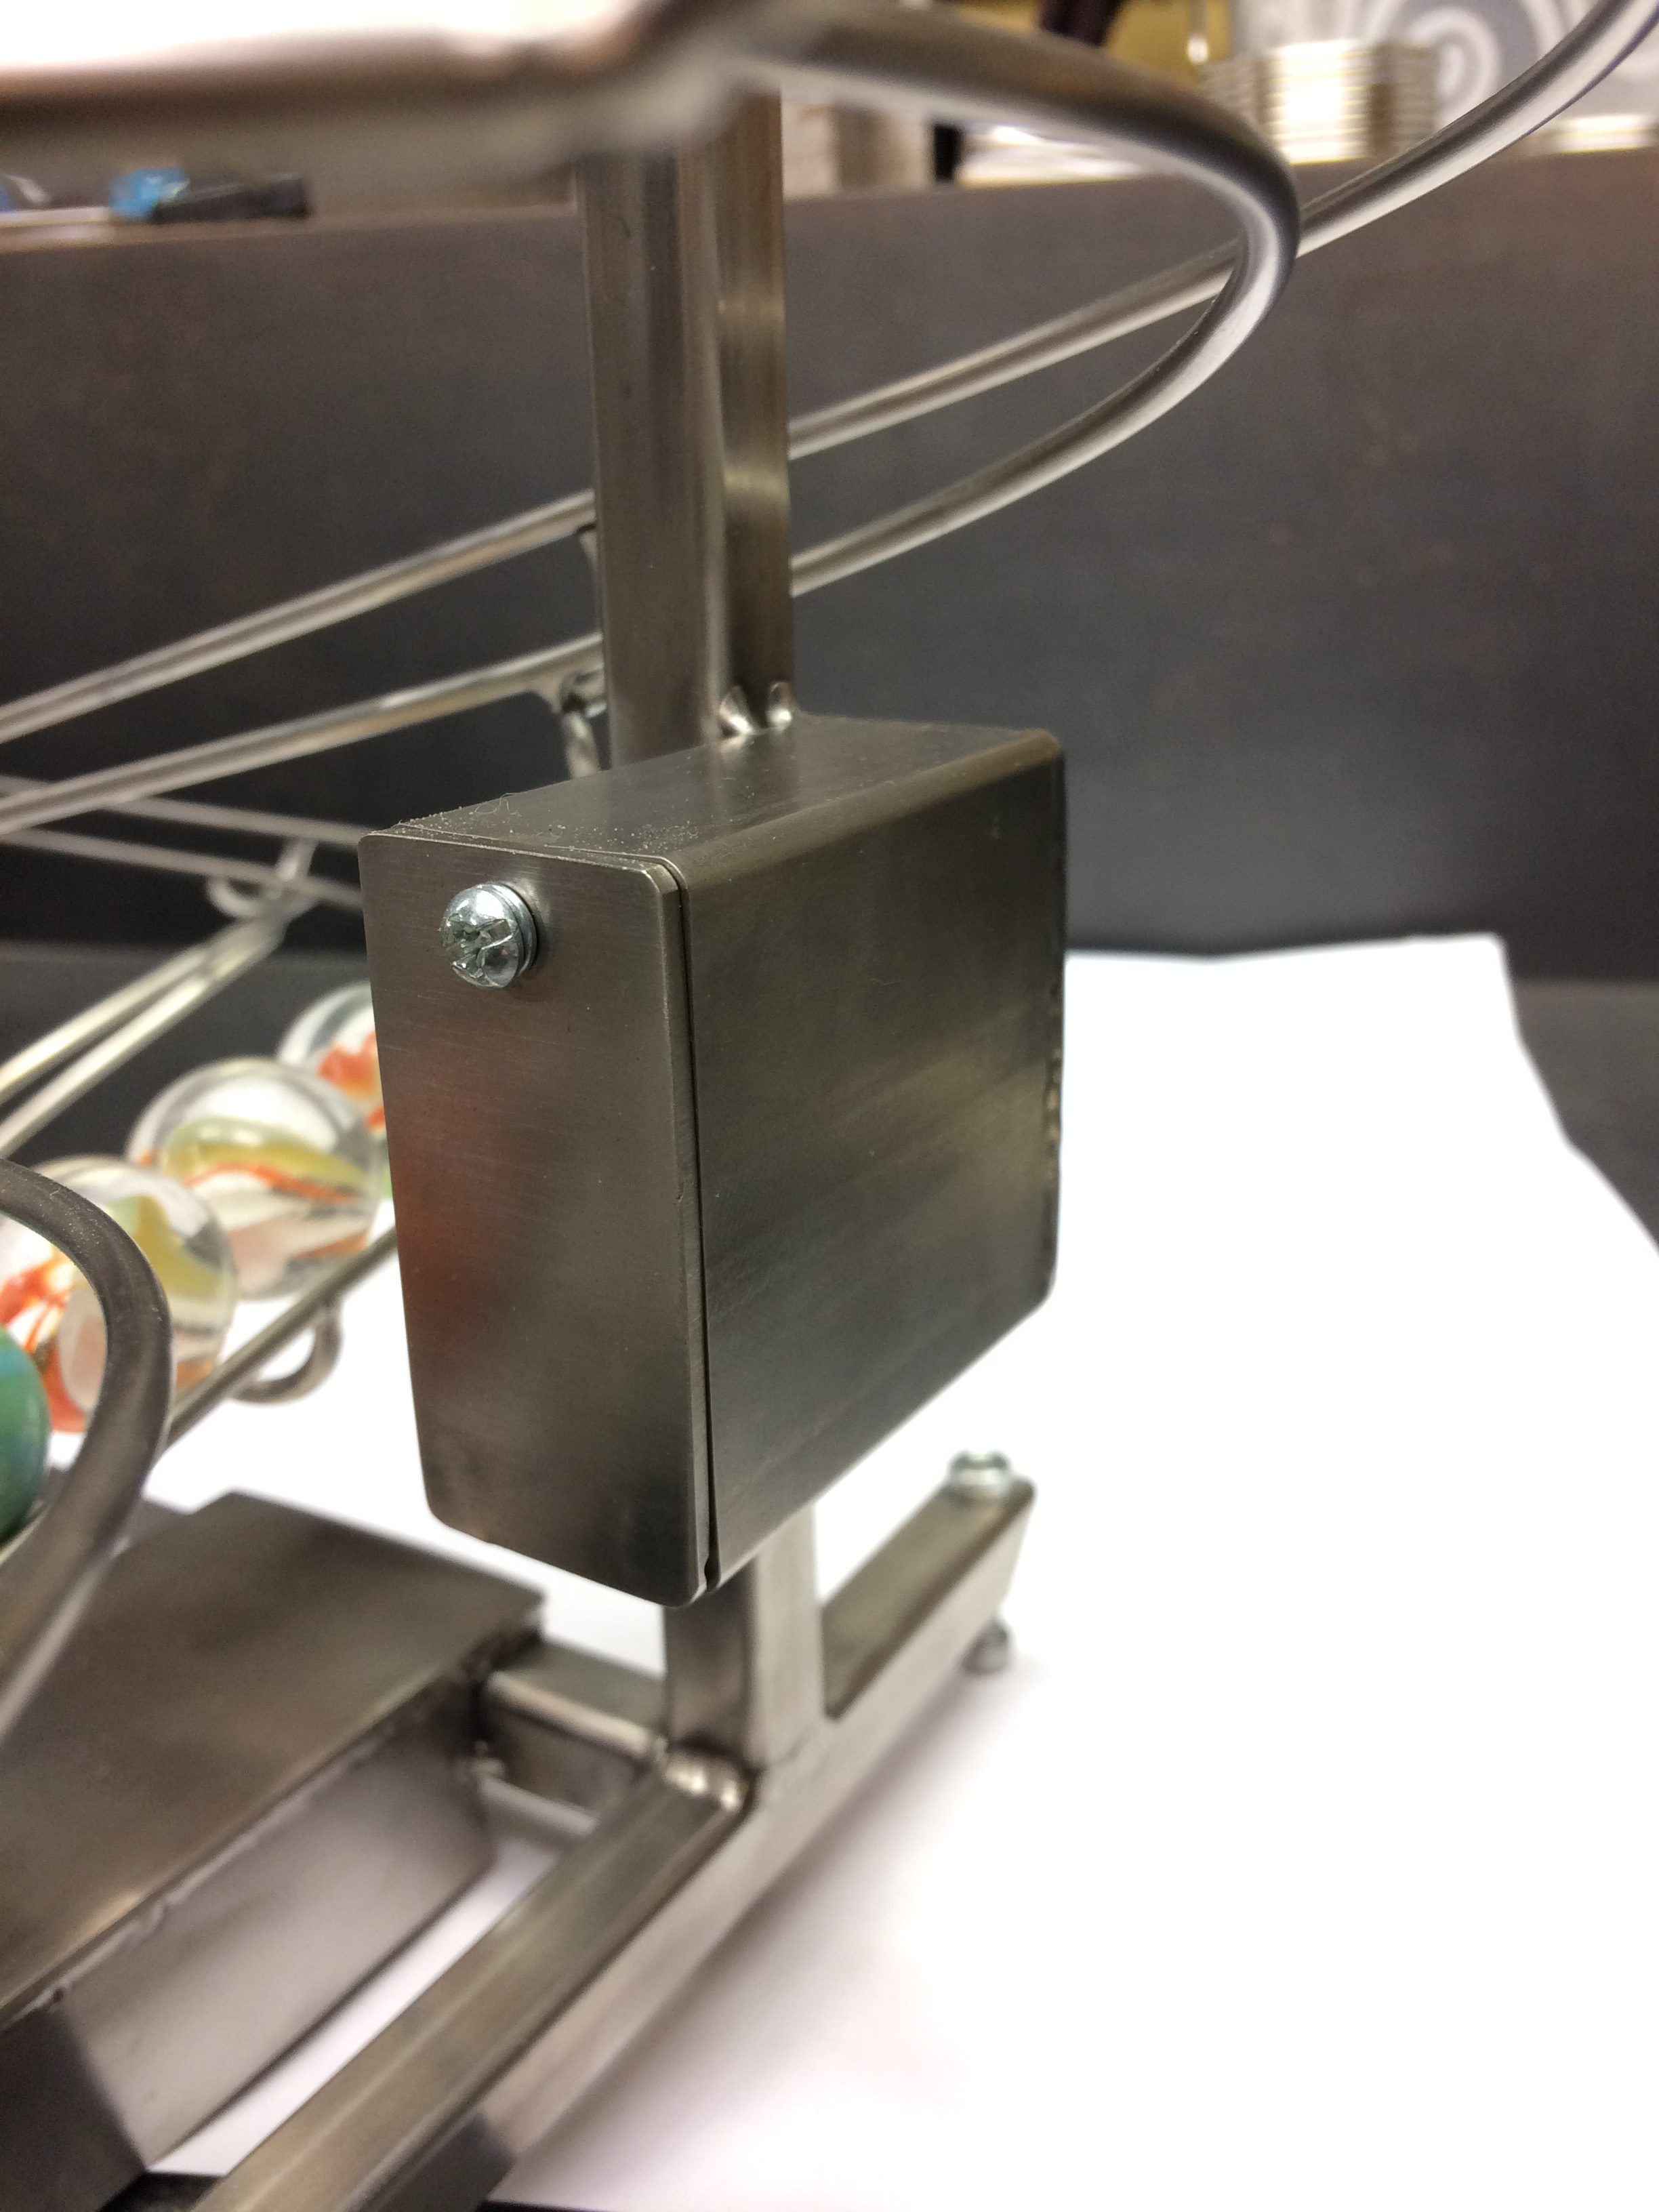
Wall mounted sculptures are often desired when there is no available horizontal space. A wall mounted rolling ball sculpture can also create quite a stunning effect, standing out the way a painting or photo cannot. A wall mount can also offer different options for layout, acting as a sort of frame around another object or objects that are already in place, perhaps home entertainment equipment or even other artwork. A wall mounted rolling ball sculpture is fastened to the wall with standoffs that are welded to the frame, extending back toward the wall. Each standoff has a foot with a countersunk hole in it with which it can be securely screwed into the wall. No special screws are required, save what might be needed for an extremely large and heavy sculpture, say something along the lines of 10′ x 10′. If you’re commissioning a wall mounted sculpture and you want it to mount to existing studs, you would need to provide me with those measurements at the beginning of the commission so that I can position them accordingly.

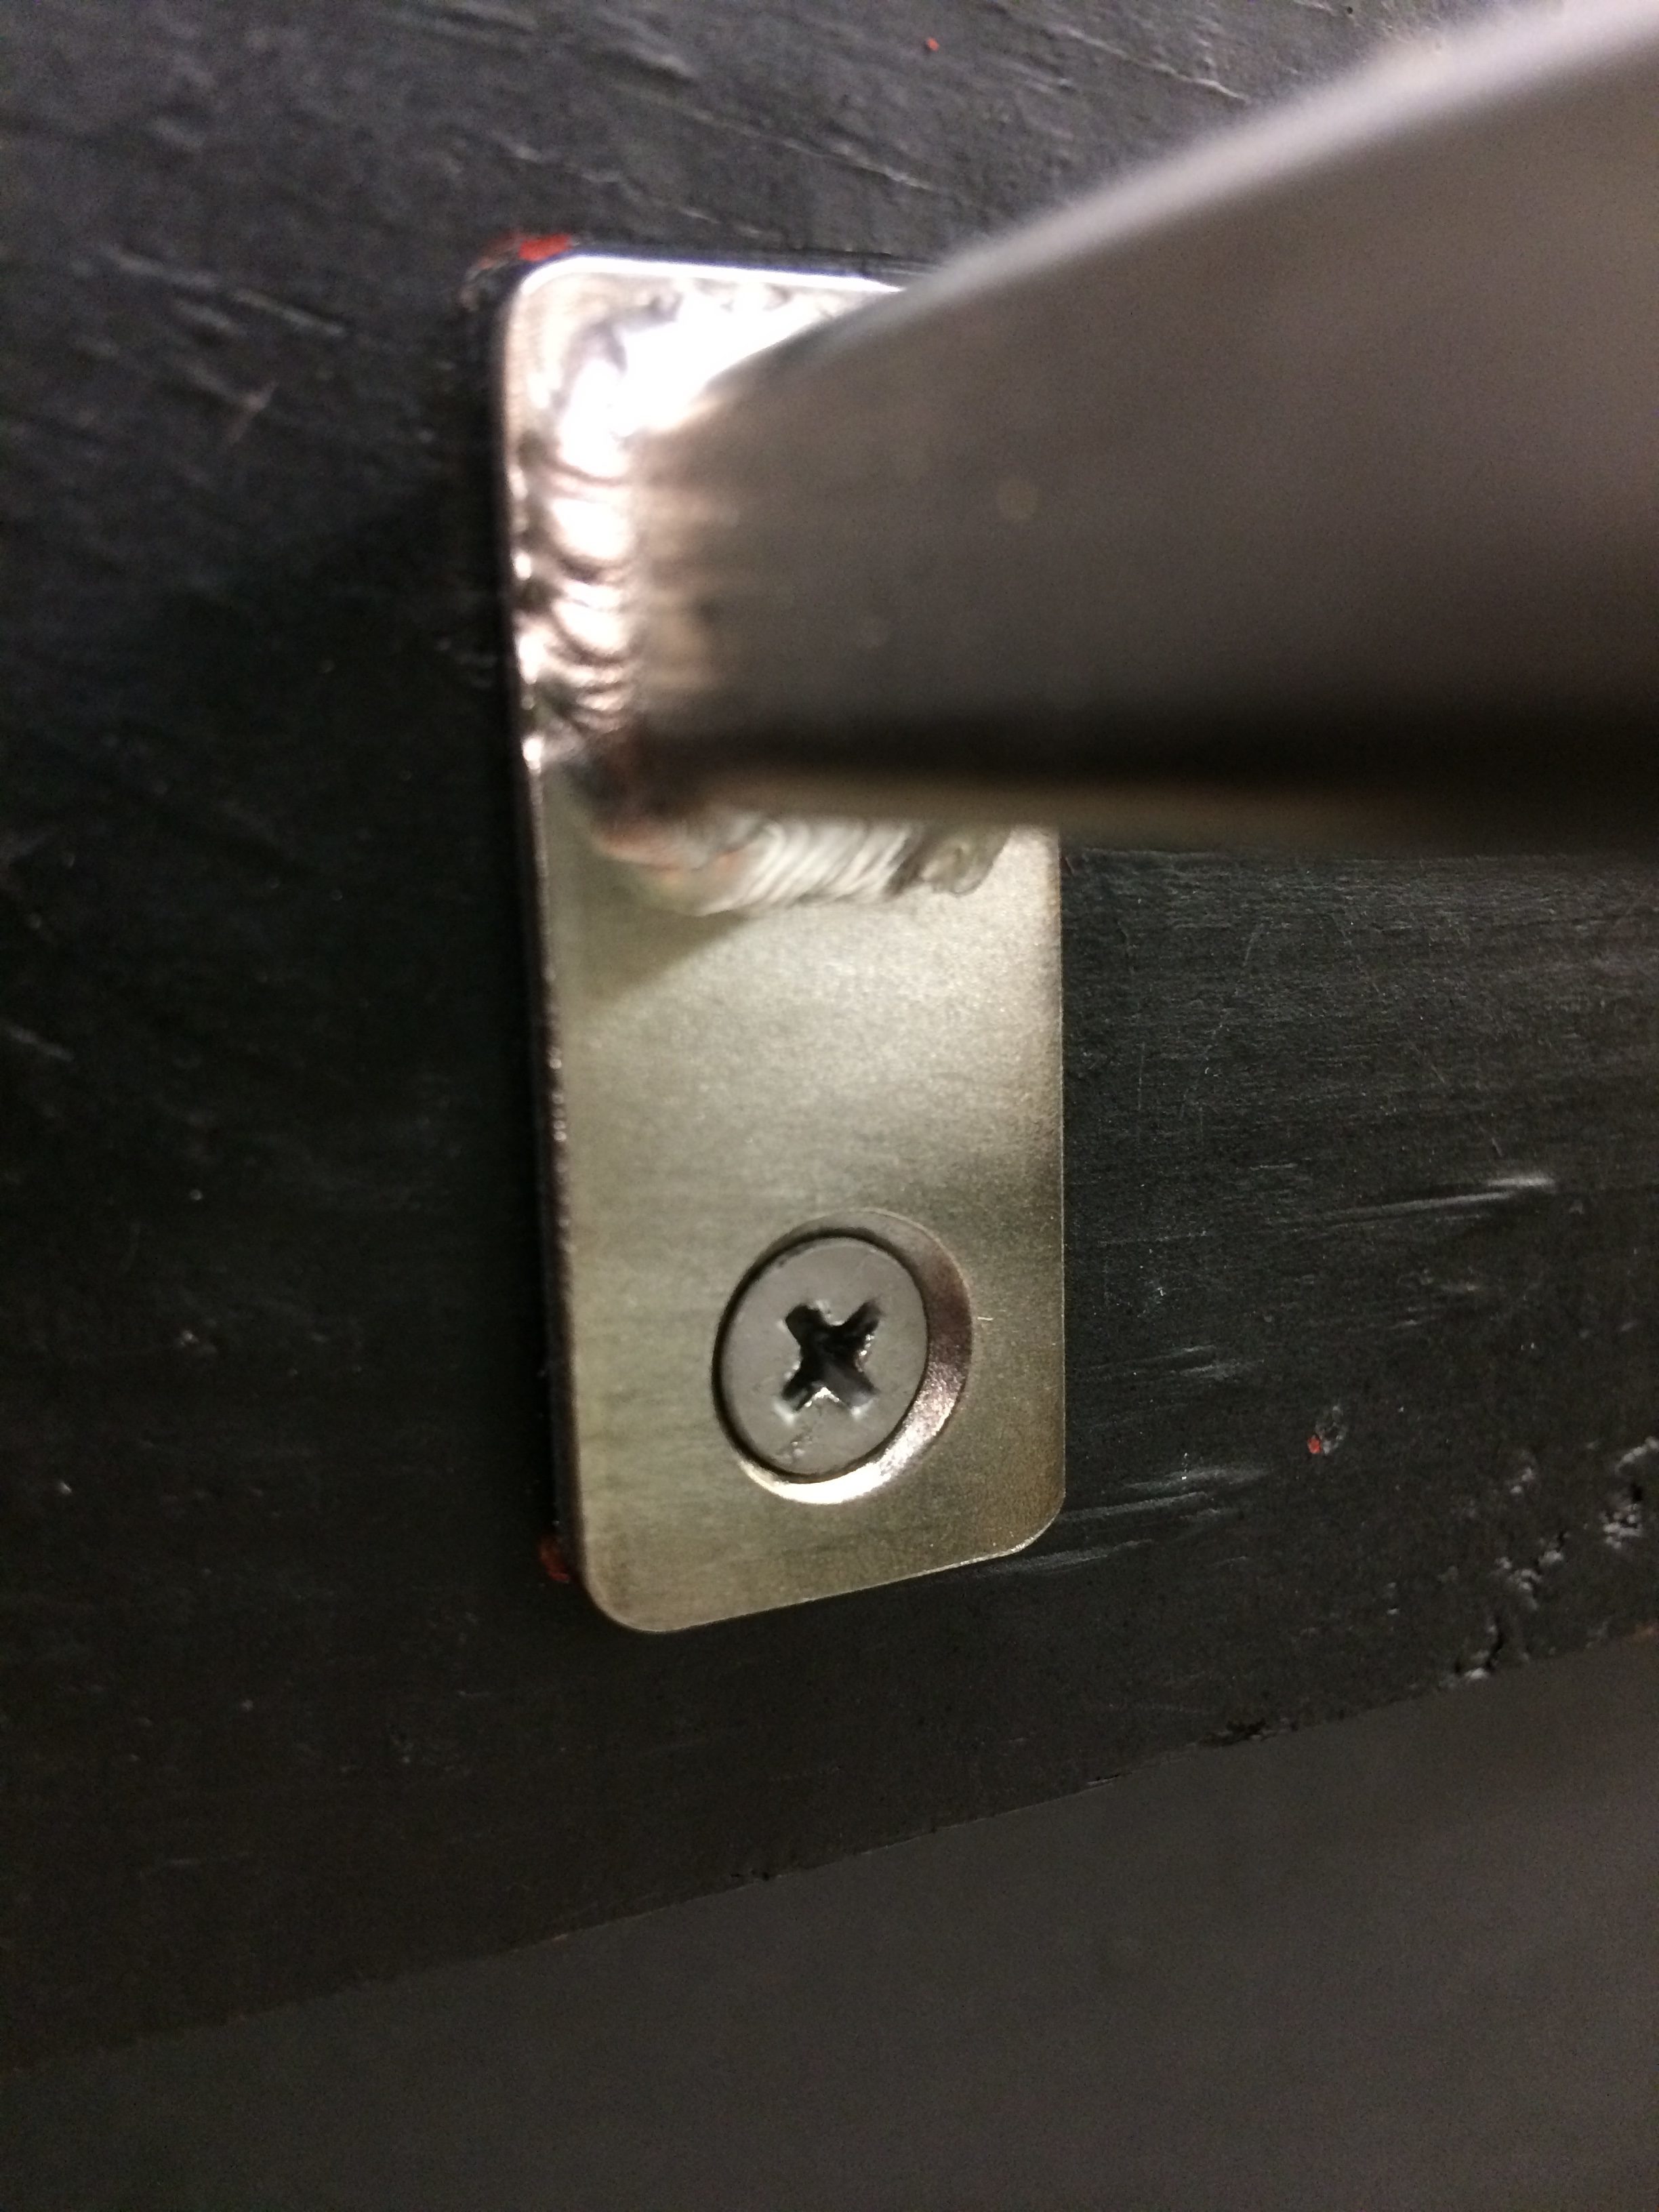
Wall mounted sculptures can screw directly into the wall with standard screws.

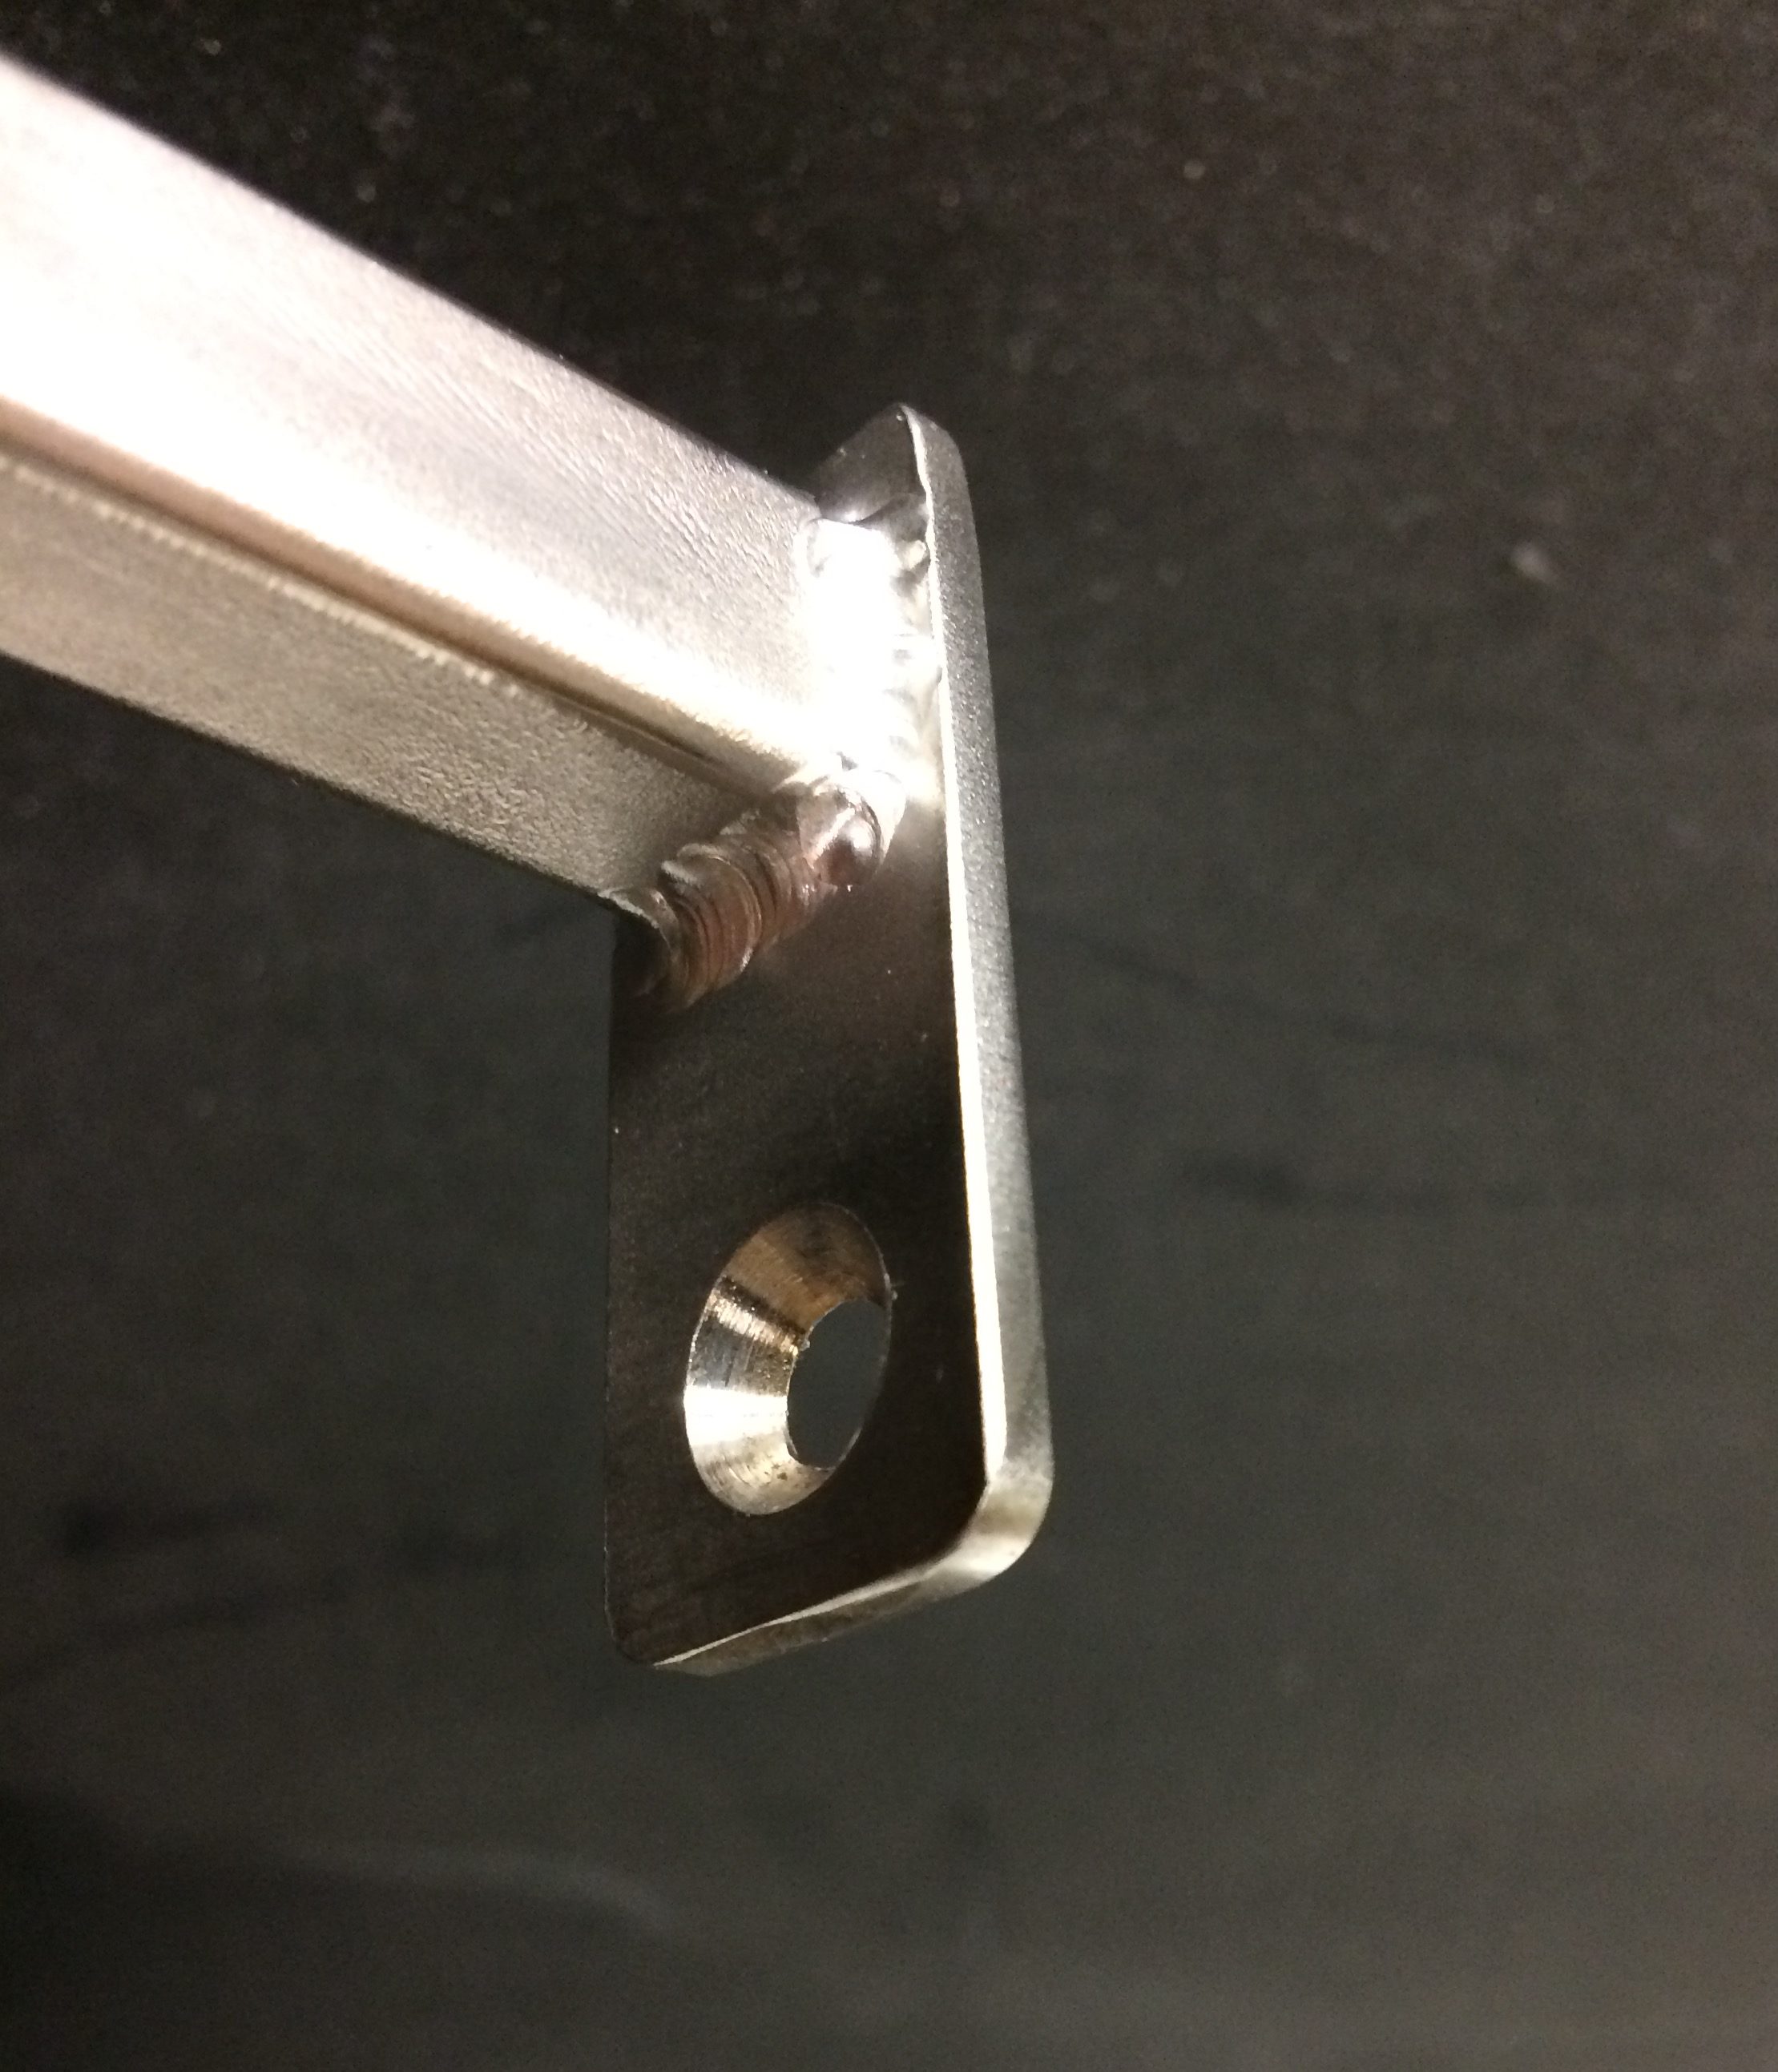
The foot mount for a wall sculpture has a drilled and countersunk hole to allow easy mounting with screws.

There may be some other mount types, such as ceiling mounts, but I’ve covered the two most common here. If you have questions about your particular mounting situation, please message me here, and I’ll get right back to you with the answers.

Answered: Common Rolling Ball Sculpture Electronics Questions

While my sculptures are largely mechanically operated, some pieces do also employ electronics as well. I suppose that at times my artwork appears so complex and even chaotic that a person might think the electrical components are just as crazy, difficult, or possibly even dangerous. None of that is true, of course. I strive for safety, dependability and ease of maintenance with my electrical components and wiring. Electrically, my sculptures are easy to operate and as safe as any common household appliance.

Starting with safety, I use a grounded power cord for all of my sculptures to prevent any risk of electric shock. Wires running between switches and motors or other electronics is routed through the frame, out of sight. Connections for switches and motors are concealed inside enclosures that are secured by screws or other fasteners so as to be safe from casual, unwarranted interference, but easily accessible with simple tools. I source my parts from reputable retailers so that repair and replacement is simple, should that ever be necessary.

The enclosure at the base of this rolling ball sculpture houses the motor for the lift plus the main power wiring and switch wiring, making things safer and more pleasing to the eye. Electronics can be accessed from underneath via a cover plate attached with screws.

Providing power to the rolling ball sculpture is as simple as plugging it into a wall outlet. To bring it to life, you only need flip the power switch. The most common is the standard toggle switch, operating with an up/down flip like a wall outlet.

This is a toggle style power switch. The enclosure is welded to the sculpture. The wires travel through an access hole in the side of the enclosure into a corresponding hole in the frame of the sculpture itself, concealing them for safety and improved aesthetics.

Access to the power switch for the rolling ball sculpture is on the back side. Wiring is safely concealed from curious fingers, but easily accessed with a screwdriver.

However, let’s say you only want the sculpture to run for a few minutes at a time when a visitor requests it. In that case, a push button can be paired with a timer so that the sculpture comes on for a set amount of time and then automatically shuts off until the button is pressed again.

Let’s take the above scenario one step further. What if you want to locate your sculpture in the lobby of your pediatric dentistry, or a children’s hospital, or a library, but you want people to be able to interact with it? Under those circumstances, we can use a light sensor instead of a physical switch. All the viewer needs to do his wave his or her hand in front of the sensor and the sculpture will run for the specified period of time while remaining safe within its display. In this way, people would be free to interact with the sculpture, yet it would never be subject to distress or damage.

If you would like to be able to change the mood of the sculpture to fit your own. I can pair a rotary switch with a speed control so that you can influence the overall activity of your rolling ball sculpture, taking it from contemplative to energetic, as you please.

Do you have any other questions about my sculpture that I’ve not covered here or in another post? Click here and send me an email through my contact form. I’ll be happy to help you out.


Answered: “Can you make a rolling ball sculpture in different shapes or themes?”

It’s not uncommon for someone who is unfamiliar with my work to ask me, “Can you do a rolling ball sculpture that would go on a wall?” or “Could you do one that was more of a cube than, say, a rectangle?” Not everyone has enough time to scan through my entire catalog of past designs and see what I’ve made. Not only that, but I feel like I’ve barely scratched the surface of vast possibilities that I could create, so my existing sculptures hardly provide proof of what I might yet make!

I still remember the first time I had a special request for a frame, something that wasn’t a standard geometric shape. A dentist asked me, “Can you do something toothy?” I was happy to say yes! The result was “#30 Molar.” The entire frame is shaped like a giant tooth! Not only that, but I had a little side dental tool knowledge, and I said, “So, dental instruments, those are made out of really high grade stainless, aren’t they?” “Oh, yes,” the dentist said. “They have to be.” “Well,” I replied, “since my sculptures are made out of stainless steel, if you have any leftover ones that you’re not using anymore I could take those and physically add them to the sculpture – “ She grabbed my hand and rushed me toward a room, “Oh, that’s so cool! We have all the old ones here that we can’t use anymore! Take what you need!” That was a wonderfully fun sculpture to create, and it still fascinates and pleases visitors at that dentist’s office.

In addition to more exotic shapes, like the sailing-themed piece, “Flying Hulls,” with a frame modeled directly after the client’s catamaran (I even looked up images on the web to make sure I got the placement and proportions of the sails correct), there are a variety of traditional frame designs that I can do as well. I made one with a circular frame that mounted to the wall as well as a number of rectangular wall mounted sculptures. I’ve done several rectangular box-type frames for free standing rolling ball sculptures that were desktop displays or placed in a display case.

Designs can be incorporated in different ways as well. For instance, instead of doing a rectangular design that mounts to a wall, I could mount it on a half-wall where it would serve as a striking room divider. I have been asked to do one that fits exactly into the space where an aquarium used to be located in a dividing wall, such that both sides of the sculpture can be viewed from different rooms. I created another piece that was tall, narrow and extremely shallow so that it could be placed inside a trade show display case. I can do a design that would fit into a particular display case you already possess or something that fits into a particular existing structure, like a staircase.

Do you have a design in mind, perhaps something themed or maybe just a slightly unusual shape? Maybe it’s an animal theme, or perhaps something sports-related? Or maybe you’re interest runs toward motorcycles, like the query I received to build one shaped like a Ducati engine? I can design themed pieces for events, too, like “The Good Bean,” the small desktop with a kidney-shaped frame I made for a National Kidney Foundation benefit, just let me know your ideas, and we’ll see what we can create!

Answered: “Will my rolling ball sculpture be too noisy?”

When discussing rolling ball sculpture plans with a potential collector, one of the concerns I often hear is, “Oh, I don’t want it to be too noisy,” or “I think the sound (bell/chime/blocks) might get annoying after a while.” Even if I’m not adding specific sound elements, like a bell, people fear the overall effect of the sculpture will be too loud. On many occasions I’ve talked with people about adding sound elements to their sculptures.

You know what? I totally get that. I remember the very first sculpture I built that had a specific, added sound element to it. The sculpture was “Opportunity,” and I put a bell on it that I made out of a piece of rectangle steel cut from a long piece of tubing. I remember fearing that the ding from it would become tiring to the ear, that you’d hear it run for a few minutes and go, “Oh, man, I like it and all, but that bell – it’s always the same. I know it’s coming, and I’m kind of sitting here gritting my teeth until it finally happens!”

Years ago I shared a room with my little brother. He used to snore loudly while I was trying to fall asleep. I knew it was coming, and I’d tense up, waiting for him to ruin my attempts to ignore him! With many nights of uneasy sleep still in my memory, I was highly motivated to not let my art be like the snores of an eight-year-old boy with sinus issues!

To put it another way, I understand your concern. You don’t want to put a piece of art in your home or business, spend all that money and time having it created, and then find out it annoys you. I certainly do not want that for you, either! To make sure you’re happy, I’ve done hours and hours and hours worth of research and testing and solved those problems. How? Read on.

First, a rolling ball sculpture, by it’s nature, does not run exactly the same with every travel of a ball down its tracks. It can be a similar, but it will never be timed exactly the same, especially if marbles are used on the piece. Why? Well, with marbles aren’t round, nor are they all the exact same size, so each trip down the sculpture is just a bit different. A marble will never reach the same point at the exact same time on a repeated basis. Plus, there are really easy ways to purposefully “screw up” the timing of the balls!

How do I force the sculpture to not be evenly timed? Have you ever watched one of my sculptures in person or via video and wondered, “Why are the hooks on the chain lift unevenly spaced?” The answer is to avoid audio fatigue and add visual variety. When I use a chain lift on a sculpture, I often vary the distance between where the pickup hooks are welded to it. In doing so, the balls may come off the lift at uneven intervals, making the timing of their trips down the various paths varied. In this way, the interaction of the balls with the elements on the tracks is also varied, so the ring of a single bell on a sculpture will never happen at the exact same time, and your ear will not get tired of it. It also makes the sculpture more fun to watch, because it does not assume a purely mechanical and completely predictable series of actions.

But what about the sculpture being too loud overall? I know some people assume it will be a constant cacophony of noise and they won’t be able to hear themselves think over it. While the levels on videos can sound too loud, in real life the sculpture makes a sound that you could liken to the running of water over rocks in the distance, or, in a much more boring analogy, a running fan. The awesome upside to this is that they are great for waiting rooms, because you can talk over them easily at normal voice levels, but then if some privacy is desired, they provide a bit of a mask of white noise. This can be particularly useful to staff in a medical location where talking among patients or doctors in semi-privacy is often desired.

I’ll add that one of my most popular public sculptures, “Tomfoolery” is placed in a library. Libraries are where people are supposed to be quiet, generally speaking, and I’ve received exactly zero complaints about its sound level. In fact, when they commissioned it, they asked me to add the bells and whistles! Well, there are no whistles, but you get my meaning. I also built it to their specs to fit in an existing glass case, and you can’t hear it loudly outside of the case. The wood blocks are notable from further away, but they can’t be picked out over the general activity of the rest of the library. You can hear a great example of it in action at the library at the end of the video.

Let’s take this one step further, however. Let’s say you had the piece placed in a location that required an extra level of volume control. In that case, I’d go with a quieter ball! Yes, that’s a thing! Using a phenolic or plastic ball reduces the sound that the sculpture makes, as the material does not cause as much vibration of the track. You can still hear it run, but it is at a much lower level. Phenolic balls also have some wear characteristics that may be desirable in certain situations, but that’s a topic for another post.

As you can tell, I understand your concerns over possible sound issues that my sculptures may create, and I do my best to take care of those before they ever reach your hands. If you have concerns, be they over sound levels or anything else, all you have to do is ask (my contact page is here), and I’m happy to discuss how we might best address them and create a piece of art you’re sure to love.

How to Commission Captivating Rolling Ball Sculpture from Tom Harold

I received a call the other day from an interested collector. He was really pleased with my sculptures he’d seen online, and he wanted me to create a commission for him.

“It all sounds great, Tom,” he said. “Now, how do we go about setting up a commission? How does that work?”

After the call I thought, “I’ve answered that question a number of times, and while there are always unique points for each collector’s piece, some of that info is the basics of any commission. If I was doing a better job on my web site, I’d be of much more help to my collectors.”

So I’m helping, right here and now. I’m typing all of this up, and not only is it going on my blog and being announced to the subscribers of my mailing list, I’m updating my web site Commissions page so that I can better serve my collectors.

Q: How does a commission start, Tom?
A: Step one, have some fun seeing what I can do! You’ve obviously become interested in my work. You’ve seen it on Instagram or Facebook, or you’ve surfed here from the results you got on a web search, or maybe you saw a video on YouTube and then went to my site. Thanks for checking out my art! Now that you’re on the site, one of the things that would help you out is to check out the Gallery page. There you can see photos and videos of some of my other work and get an idea of my style and see some of the cool elements, sizes and themes that make up my rolling ball sculpture. While you’re doing that, make a few notes about what you like or dislike. Do you like lots of audio elements? Maybe it’s the wiggly track, or the tall coil, or spirals, or the collector that holds four balls before it tips and sends them on their way. Have fun taking it all in and noting your favorites!

Q: In addition to the fun stuff, I need it to mount to the wall (sit on a table, run all day, or…?). Is now the time to mention that?
A: Yes, indeed. Take a minute to come up with some of your requirements. Is it a free-standing piece that will sit on a table? Maybe it mounts to a wall. Would you prefer a manually loaded sculpture? How about the frame shape – square, rectangle, box, pyramid, circular? Do you want it to be particularly quiet, or do you like lots of audio elements?

Q: Do I need to let you know the size and where it will be displayed?
A: Yes, please. Size is very important, so having some dimensions for height, width and depth is great, even if they are rough estimates. If the location is particular, say you have a case set up for it already, or it fits between existing architecture, let me know, providing photos if you have them. It’ll help us get started in planning and in determining a budget.

Q: How much will my sculpture cost? Would knowing my budget help you plan the sculpture?
A: Each piece is different, though there are general guidelines, which is why I ask for size and your particular list of enjoyable elements you’d like to have on your rolling ball sculpture. If you already have a budget in mind, indicating that will help us plan your custom artwork. Check out my Commissions page on my site and you’ll get some other ideas of what would best suit your tastes and desires.

Q: What’s the best way to send my information to you?
A: Once you have a basic list of the type of sculpture you would like, you can either head over to my Contact page and either send me a message or call me with your information. If I’m not able to reply immediately, I will get back to you as quickly as I can.

Q: How does the money part work, Tom?
A: I handle the commission payment process the same as many other artists. To secure the commission I require a 50% non-refundable down payment. The balance of the payment is due upon completion of your amazing rolling ball sculpture, prior to its delivery. Packing and shipping are extra. You will be able to watch the creation process of your artwork via several social media channels, unless you have a special request such as a surprise gift for someone. In any event, I will still produce photos and short videos of the progress and share them with you. You will be able to see photos and video of the completed sculpture prior to your acceptance and payment so that you are certain you are happy with it.

Q: What methods of payment do you accept?
A: To this point, my collectors have been happy to pay me with Paypal or, in the case of a local pickup, cash. Should you have another preferred method, I will be happy to discuss it with you.

Q: Do you accept credit cards?
A: Yes, you can pay with a credit card via Paypal.

Q: When can I expect to receive my fantastic rolling ball sculpture?
A: I can give you an estimated arrival date after knowing more about your desires for your sculpture.

Q: Can you build me one exactly like the one in the movie “Fracture?”
A: While I can create a stainless steel piece of the general size and tone of the sculpture in the movie “Fracture,” I do not create exact copies of another artist’s work.

Q: I like cars (or motorcycles, sailing, astronomy, or…?). Can you do one with a theme around that?
A: I sure can! Send me your thoughts in your initial contact, and we’ll see what we can’t dream up!

Q: I have a dentist office (or optometrist, therapist, bank, hotel, or…?). Can you create a sculpture that highlights or distinctly announces my business?
A: I certainly can! Let me know your thoughts on how you would want your business to be accentuated with your sculpture, whether it would be through physical wording, or by more by creating a themed piece, such as the tooth-shaped frame I made and used actual dental instruments as part of a sculpture for a dentist’s office.

Any other questions? Please let me know! Just send me a message or call, and I’ll be happy to speak with you about creating a truly unique and mesmerizing rolling ball sculpture just for you! I look forward to hearing from you.

“High Gear”: Video, Racing, Creative Passion!

I’m happy to have an update for the blog featuring a recently completed rolling ball sculpture video! I’d been having technical issues with iMovie since late 2016, but those are resolved now, and I’m overjoyed to be able to share full-length feature sculpture videos once again! I plan to have another new video each month starting this month of May and continuing through August. That’s nowhere near my record 12 videos in 2014, but most of those were of small sculptures that took me only a week or two to complete, plus my instructional videos. This video for “High Gear” and the four that will follow are all feature videos of larger sculptures. It’s great to see things moving in this direction!

The theme for “High Gear” was proposed to me by me collector. He is a computer expert as well as an avid racing enthusiast, especially of the IndyCar series. His enthusiasm carries over from simply watching events on TV or attending as a spectator. He owns some fascinating vehicles, and he even has a racing kart that he takes to local track days to rip through corners at high speed.

Given that I am also an auto enthusiast, having grown up with a father who has been captivated by vintage tin his entire life, I was very excited when he held up a large steel gear and said, “Do you think you could add this gear to the sculpture?”

I was probably more amped up about the concept than he was! I wanted to do that and add a few levels on top of it! Not only did it give me a chance to play around with car parts, I was able to really exercise some creative thinking, designing and building with this piece. I said, “I know you race karts. What do you think about putting some of your kart spare parts onto the piece?”

I went home with a box of sprockets, a gear, springs and various other items and a big grin on my face. This was going to be awesome!

Indeed it was, but there were hurdles to overcome. The sprockets and chain he’d given me could be made into a ball lift, but the sprockets were meant to bolt to a hub on the wheel, and those parts would not fit onto the sculpture, at least not in a way that would be at all visually pleasing. Therefor, I had to come up with hubs for the sprockets, and they had to look really cool!

What to do? I could make solid discs. Boring. Really boring. Also unsuitable, because you can’t see through them, and that takes away visual appeal from the rest of the piece. I could make any number of  spoke designs, and while a classic five-spoke design would mimic many a racing wheel, it would lose most of its appeal when rendered with a flat sheet of stainless. The visual power in the five spoke mag wheel comes, in part, from the curved depth of the spokes, which I was basically going without.

But a wheel, yes, a racing rim would be the most natural feature to add to this rolling ball sculpture, its theme rooted in high speed automobilia. I just needed to find the right one. It was time to hit the internet and see what sort of inspiration might be idling, waiting for my eyes.

It took a little while. There are lots of wheel designs! Many were unsuitable for their basic design. Either they wouldn’t render well as a flat shape, or they were just plain ugly. With diligence, however, I eventually came across these photos! The Eisert car had a wheel design that looked powerful, and it would transfer well when simplified into a more 2-dimensional design. Perfect!

I took my design to a local waterjet company, and they created a pair of sprocket centers from 1/8″ stainless steel to which I welded hubs with a set screw for the shafts. The sprockets bolt to the hubs, just as they would a go kart. In fact, if you really needed them, you could unbolt them and put them on your kart and use them! The chain is racing kart chain, specific to this application. I fabricated stainless steel ball pickups and welded them to the chain. The result is one of the most interesting chain lifts I have created to date! The stainless hubs combined with the gold anodized sprockets and chain are quite striking. I love how unique and visually arresting it is!

Adding the gear was a challenge, as I didn’t want to effectively just make a hook and hang a chunk of metal from it. I wanted it to really be part of the sculpture in some way. Its sheer weight made things difficult. As a counterweight it made little sense, requiring far too much force to move it in the space I had available. As a static component it couldn’t just hang in some area, doing nothing. I just can’t have that. I like functional parts, generally speaking.

I thought on it quite a bit, and eventually I decided that it would work well as an element in which the ball would pass through. That was fine, but then, at my collector’s request, it also had to be removable! So, how can I have track passing through it if the track has to come apart so that the gear can be removed?

I’m going to let you find that out, plus see the other fun parts I added, like the spring-as-sliding-weight in the video below!

This was serious fun, building this rolling ball sculpture. Having a passion for cars, this hits on all cylinders for me. I’d love to do a piece that’s even more deeply infused with automechanical components, like a frame and much of the parts from an old Triumph motorcycle, or a large amount of pieces taken from distinctive automobile such as a Ferrari, Packard or Jaguar. What about another racing theme? With a full complement of vintage parts: suspension, steering, fuel control, brakes and on, a sculpture such as this would command all the attention in the room!

If you’re interested in seeing what I can create for you, drop me a line at my contact page. In the meantime, check out the video for “High Gear.” Thanks so much for following along my creative path with rolling ball sculpture.

Video for Ashely Longshore’s RBS Valentine’s Day Card!

There’s been such a flurry of activity lately that even though this work of art was completed all the way back in February, I didn’t get the video done until fairly recently. It’s a really cool little piece that has garnered accolades from someone big in the art world!

Ashley Longshore is considered to be THE pop art diva. Referred to as “Andrea Warhol,” the New Orleans painter has been featured in publications such as Forbes, Elle, Vogue, the Huffington Post, the New York Post and many others. Her clients include film, television, sports and rock stars. She has accomplished all of this without having gallery representation. Rather, she sells her work mainly via social media, especially using Instagram.

How do I fit in? Back in January Ashley posted on Instagram asking for people to send her valentines. I thought this might be a fun way to possibly connect with someone who works with the world of art marketing in the same way I am also pursuing it. I created her a folding metal card that opens up into a real rolling ball sculpture! I had no idea if she would pay attention to it at all, if I’d even get a reply, but it seemed like I might have a fair chance, as I was doubting anyone else would send her something remotely similar.

I sent it off and sort of forgot about it in the rush of other projects, but a few days after Valentine’s Day I got a comment on my Instagram from Ashely herself! The full comments are in the video, but, in part, she said, “omg!!!!!! This card is the COOLEST card on the planet!!!!!! I LOVE it! I will have it forever! u r awesome!!!!” That’s not quite an exact quote. I actually left out a lot more exclamation points!

I am so grateful for Ashley’s comments! And there are more! Below you can check out the video for the sculpture that is loved by one of the biggest names in pop art!

RBS Artist Interview Series – In production!

A month back I brought you a wonderful interview with the talented RBS artist Stephen Jendro. I stated at that time that I would be releasing one new artist interview every third Thursday of the month. While that was admirably ambitious on my part, I didn’t fully realize how challenging it would be. In order to bring you high quality material that I am gathering from all across the country (and perhaps around the world!), I’m going to have to slow down the timeline a bit. There’s lots happening in that expanded time frame, however!

While there will be a wait, I can honestly tell you it is going to be worth it. I’ve been using much of my time lately to interview two more amazing rolling ball sculpture artists and to come up with some really fascinating stories from each of them. I have also been lining up further interviews for the coming months with other stunningly talented artists. It’s really going to be amazing. I’m so stoked about the opportunity to bring this to you! These artists are helping to provide a look at the emergence of a modern art form in their own words. It’s fascinating! Plus, if you’re a creator, yes, there will be building tips thrown in as well. You know you love it!

This is a minor gear change, but it will be for the better. I look forward to bringing you some A+ material that’s really going to shed some light on the unique and fascinating world of rolling ball sculpture and those who make it!

Of course, none of this will affect blog posts on other topics related to my art. You can still expect to see those popping up, so stay tuned!

The Underrated Value of Asking for Help

I’d like to say I never need to ask for help, that I figure out every problem I have on my own. I think I used to spend lots of time trying to figure things out on my own. I just hated asking for help lots of times, and it didn’t serve me well. In the past year I’ve had a couple of experiences that reminded me of the value in asking for help.

A little over a year ago I was tasked with creating a rolling ball sculpture that was going to be displayed in the mayor’s office. The timeline to create the sculpture was extremely short, just days, and this is with me working a full-time job already. I had the entire piece structurally complete from one end of the other, but I was having teething problems. There was a large spiral that wound down and then merged directly into a coil. It was a really cool effect, but it wouldn’t work properly. Mostly it was fine, but on rare occasion one or two marbles would inexplicably just fall through from the top of the coil straight out the bottom. This isn’t something I could display with any sort of pride. With rolling ball sculpture, if it doesn’t quite work, then it doesn’t work, period.

After testing and tweaking and having only slightly better results, I realized time was too precious to lose any more of it. I needed help, fast. I posted to the Facebook group for rolling ball sculpture, describing my problem. In an instant I had builders from all over the world, some with years of experience, lending a hand. Ultimately I can credit Matt Gaulden with offering some key advice about the size of the coil. I had to cut out the coil and replace it, but it worked like a charm. Matt is a great artist who has a host of instructional resources for building rolling ball sculpture. You can check out his work and his online assistance here.

The sculpture, “Meer-col,” was a huge success at the mayor’s office. In fact, I was told by one of the office staff that it was such a big success they had to move it out of the common office area and into the mayor’s conference room, because “too many people were enjoying it.” Check out the video and see for yourself!

More recently, I needed to do some work on the blog. Time wasn’t as crucial, but it was definitely a case where sooner was preferable to later. My WordPress skills are miniscule compared to my sculpture skills. I wanted to do it on my own, and I’d intended to do it on my own, but I’d been intending for months, and it was obvious that it was going to take me too long to figure it all out by myself. I was out of my element. I went to my online group for working artists, asked for help, and Divinity Chan offered to lend a hand.

Divinity was a big help. She was very patient and listened to my desired changes. Patiently she walked through what she was doing, explaining how she was making changes and allowing me to take notes. We fixed errors and made improvements in a matter of minutes – tasks that would have taken me hours of precious free time to work through on my own. As she worked through the process she taught me how to make future changes on my own. “I’m all about empowerment,” she told me.  Now I have not only an improved site, but the ability to make future updates myself, which is perhaps the most helpful thing of all. If your WordPress site is giving you a headache and you need someone to help relieve the pain, Divinity is an excellent resource. You can reach her at divinityatdivinitychandotcom. Divinity is also a wonderful artist, and I’d be remiss in not including a link to her excellent art work. You can see her vibrant paintings at DivinityChan.com.

I have had to learn a lot of skills to make my art, but one that has proven very valuable to me even before I started making rolling ball sculpture was the skill of asking for help. It’s all about practice. The more you do it, the easier it gets. Save yourself grief and needless frustration. Start practicing. The benefits are fantastic.

It’s a life’s calling, Part 2 – Interview with RBS artist Stephen Jendro

Last week introduced the first in a series of interviews I will be conducting with noted rolling ball sculptor artists from all over. I had realized that the art world and the world at large was missing out on a great deal of information about this wonderful art form and the amazing individuals who are creating it. I aim to change that with these interviews, to provide a fuller awareness and begin the process of creating an historical reference for future creators and fans of rolling ball sculpture.

I previously brought you part one of a wonderful interview with the talented Stephen Jendro in which he discussed how bad art leads to good art, working with the Titan IV rocket program, how the Watts Towers inspire framing and sculpture research at the dawn of the internet.

This week in part two Stephen will reveal his biggest challenge when building rolling ball sculpture, what stresses him out most about building RBS, tips for beginners, safety and problem solving. And the birds show up again.

Kinetic-Metal-Sculpture-Jendro-050

TH: Aside from your welder, what is your favorite tool?

SJ: My little Pandora radio. Not much gets done without the tunes, seriously.

TH: What do you listen to?

SJ: Todd Snider, Tom Waits, Amos Lee, John Prine.


TH: In terms of building rolling ball sculpture, what do you enjoy most about the building process?

SJ: I think what I enjoy the most is that, in order to build one of these things there’s five or six different, discrete activities, and I enjoy them all, and I feel very lucky about that. It’s like the scenery changes. It’s not just one task. I could spend hours, days, sketching things out, whether it’s a new idea or a new sculpture, and that’s an activity unto itself –where I get to sketch and draw ideas. Then I get to physically go out and buy steel. I love doing that. I love going out and picking up steel and parts and bolts and washers. Continue reading