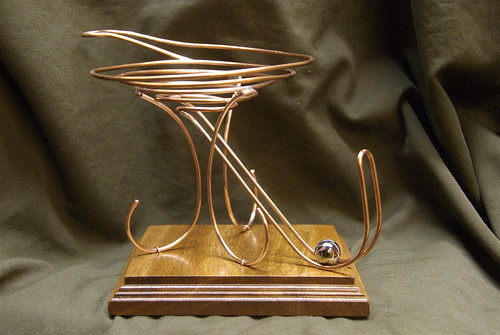
Want to make endless loops and turns and bends and ramps of wire? Take a long piece of wire, bend it into a “U” at one end, and how you’re started! Just, you know, bend it some more. Or, really, if you’re into minimalism, I guess you could just go with what we have here and call it good. I tend to complicate things a bit, though. I’m weird like that.
Tag Archives: RBS
Solo Spiral Sculpture Completed!
I had a long weekend this weekend, and I used it to my fullest advantage – I did art work! The idea for this series of small sculptures has been brewing for months now. It’s actually part of a meme from Facebook, and I think I accepted the challenge sometime back in…July? August? After that I had a lot of other projects in the pipeline, but didn’t let go of the idea. They were going to be *really* simple, but then I asked dad if he could whip up some wood bases for them to make them a little nicer. Yeah – I asked a fellow perfectionist to just whip something up. Right! It took a few months, but I think that it was well worth the wait. He made them waaaay nicer than I had asked for! Thanks, pop!
So dad did some awesome bases, but I was still caught up with other stuff. I did manage to bend up some initial elements for the sculptures a month or two ago, just some basic spirals. Finally, however, I was able to get down to the business of actually assembling them once Christmas had passed. Thanks to the long weekend I managed to finish this one.
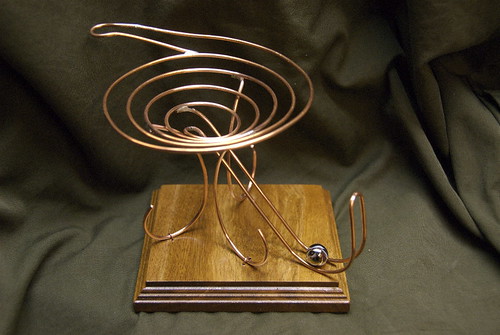
Here is the first from a series of five that I will be doing:
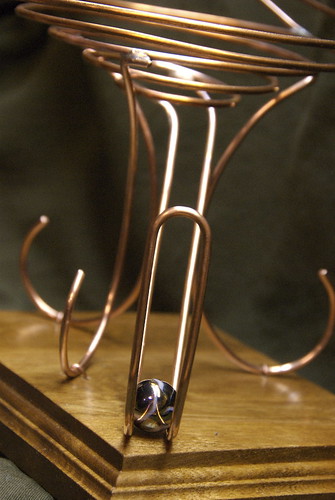
As you can see, it’s a rather simple design. Just a basic spiral. It’s a little hard to add much more to something this small, but I tried to do something fun with the ending ramp. The path dips sharply coming out of the spiral, and by the time the marble reaches the end it has built up a good bit of speed. It reaches the upright portion and tries to climb right up it, runs out of steam, and falls back on itself where it comes to rest in the bottom of the “U.”
Above is a fun view of things and kind of gives you an idea of the roller coaster feel it has when it finishes.
For a simple piece I think it turned out pretty well. After finishing it I immediately started on another one. I hope to have it completed by the end of the week! I just love finishing projects. It’s so counter to the way I used to live my life where I’d start something, get discouraged, shelve it, and then feel bad about the whole thing. There were some things about this sculpture that didn’t fit my idea of the perfect piece, but I managed to let go of that stuff and just be okay with it. Pretty kickass.
What do I do with this stuff?
Bare beginnings
Copper Curl
Ah, THIS is what I’ve been going after. I think this is finally a photo that feels different for me. I guess it’s a lighting thing. It started with the dirty salt shaker, and now we have this. It’s possible that something may finally be happening with my photography. I hope. I don’t know, but I hope! I don’t know quite how I did this (other than a couple of obvious things), but I hope I can do it and do it better further down the road.
Pieces, pieces
It’s a hit!!!
Nephew’s Rolling Ball Sculpture
Begun way, way, waaaay back in, uh, whatever month it was begun in – August? – I have *FINALLY* finished the sculpture that I constructed for my nephew. I generally try to stick with the “one” rule on “one-pic-a-day,” but the RBS stuff is always special, and I wanted to provide a couple of views of the finished piece so you could get a good idea of how it looks. Thusly, you get an extra pic today. Woot!
I had to tweak and futz with things, but it wasn’t all that bad, really. It was mostly making things sturdier, and then there was the creation of the extremely cool wood base that my dad made for it so that my nephew (who is five) wouldn’t accidentally damage it every time he picked it up to move it around. It turned out quite nicely considering the initial build time on it was only six hours! I’d like to do some others around this basic theme, and I think I may get Tina to throw down some of her awesome stained wood skills on future wood bases.
Yet another art project completed! Woohooo!
Woody wood wood, Part 3 – More than I hoped for
Woah! Check ’em OUT! These humble pieces of timber started out as mere leftovers from dad’s scrap pile! Remember this? Don’t they look awesome now?!?!?!? Yes, they do! I was expecting just some straight cut stuff with rounded corners, and he’s gone and made stuff that, well, it looks really nice!
Man, now I have to get some decent rolling ball sculpture built to mount on them. Crap – dad’s making me look bad!
Woody wood wood, Part 2
Dad is helping me out with some of the bases for a few rolling ball sculptures that I’ll be making. I really wasn’t expecting anything more than for him to cut them to a basic shape and then maybe run some sandpaper over the corners, but he’s already done more than that! He’s the king of woodworking, so naturally he can’t just give them a quick rubdown with 400 grit and call it done. No, these things will have routed edges! Nice, eh? He’s talking about staining them and everything now. They’re going to be pretty awesome!


